|
|
| |
How To Bone A Game Bird
We've found that our culinary opportunities with pheasant, partridge, grouse, and other
meaty game birds are greatly expanded by taking the meat from the bone. A recipe can be easier to produce,
be more pleasing to the eye, and more pleasant to serve when the meat has been removed from the bone in a tidy,
careful way. In the example below, a just-thawed, field-shot pheasant is taken apart. The bird was gutted
and skinned after the hunt, and double vacuum sealed for an extended storage in the freezer. This
particular bird is in good shape, as it was neatly taken down with a head shot. Take your time, and
once you're done, make the most of that lean, delicious bird
meat! As you work your way down this page, you can click on the images to pop up a larger veiw of each.
 |
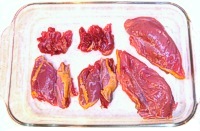 |
The general objective of boning is to remove the meat from the bone and produce a
single boneless piece from each section of the bird. With the following method you'll end up with
six cuts from each bird: meat from two breasts, two thighs, and two drumsticks. If you're industrious,
want it for a particular recipe, or wish to freeze it for later use, cook the remaining
carcass down for wild game bird stock - not necessarily a summer time project.
|
 |
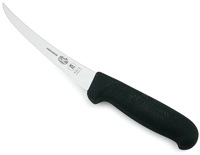 |
First things first. Other than having a bird in hand and a recipe in mind,
you've got to have the right tool for the job. There's a reason that professional
chefs and meat packers reach for a true boning knife when doing this sort of work.
The slightly flexible blade works around the bones and joints, and the curving tapered
shape makes the best use of your wrist movements while doing detail work.
Our favorite - and a true industry standard - is the 6-inch "Fibrox" series boning knife from
Forschner (a division of the famous Swiss knife maker, Victorinox). These knives handle
beautifully, are very reasonably priced, and take a great edge.
>>We buy ours here (click).
|
 |
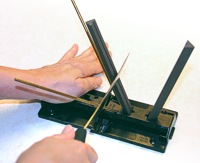 |
A little more preparation. This task goes much more quickly, and leaves the meat
looking much tidier, if your knife is very sharp. Here, we use the very effective (and safe)
Spyderco sharpening system to dress the edge of the Forschner knife. Notice the placement
of the left hand beyond the metal hand-guards - we're boning a bird, here, not fingers! This
same sharpener is also great for field knives and game shears, too.
>>We buy ours here (click).
|
 |
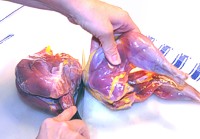 |
To make the bird easier to handle, break it apart at the back, separating the leg
section and breast section. In the instruction that follows that will be the
only area of the skeleton that we will separate. We will not be taking each
section apart at the joints before removing the meat. Further, the steps offered are only a
guideline -- as you become comfortable with the process, and see how quickly and easily
you can bone pheasant, chicken or any game bird, you will, no doubt, develop your own
routine.
|
 |
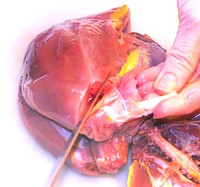 |
Working with one side at a time, hold the breast and upper back section and cut,
through the meat, to the bone around one of the shoulder joints. The purpose is to free the muscle group
from where it anchors to the shoulder joint.
|
 |
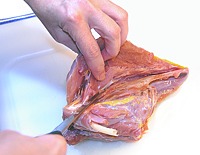 |
Run the edge of your blade along the base of the least meaty part of the breast -
along the side furthest from the breast bone. Cutting close to the rib bones, while holding onto
the breast meat, lightly draw the blade toward yourself repeatedly as you progress along the
rib cage until you reach the breast bone. It's as if you were pulling the breast meat away
from the skeleton with your hands, but you're using the knife blade to help make a clean separation
without tearing the meat. You're using the knife to help you remove as much meat as possible,
in one piece, from the bone.
|
 |
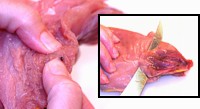 |
As you're working, keep inspecting the meat for bird shot,
punched-through feathers, shards of bone, and any bruised or bloodshot meat that might taint the flavor. Once the meat is off the bone, you'll
see how easy it is to find and remove all the unwanted hunting artifacts.
|
 |
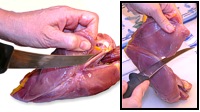 |
Once you have separated the breast meat from the ribs all the way to the
breast bone, finish removing the breast by making a clean cut around the wish bone
(at the neck of the bird) and along the breast bone cartilage.
Repeat the process to remove the other breast.
|
 |
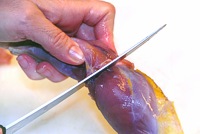 |
Each leg will produce two pieces of meat: a thigh and a drumstick.
To bone the legs, keep in mind the idea of separating the meat from the bone while
keeping the meat in one piece. Make a cut, through the muscle down to the bone, around
a knee joint just where the muscles come together. We're after the meat, so there's no
need to take the extra step of separating the joint itself unless it eases your work.
|
 |
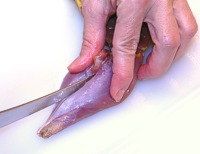 |
Lay the drumstick down so that the inside faces up, and make a vertical
cut to the bone on the inside of the leg where the muscles join.
|
 |
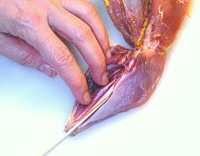 |
Run your knife point lengthwise along the bone, separating the
meat from all sides.
|
 |
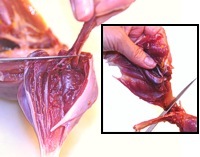 |
Reach in with your fingers to grasp the bone and pull it up and out as you
separate the meat, and finish cutting it away at the knee joint where you made your initial cut.
|
 |
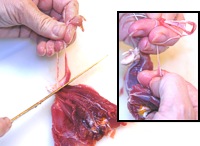 |
There is a trick to removing the tendons in the drumstick, but that is done
when removing the feet and doesn't always do a thorough job. Instead, use your fingers or
kitchen pliers to pull them out (like fish bones) while using your knife blade or thumbnail to
hold down the meat.
|
 |
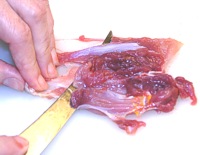 |
To remove the silver skin on the outside of the drumstick, where it's particularly
tough (we don't bother removing it from any other piece), lay the boned drumstick silver skin
side down on your cutting board. Place your blade edge near the hock end, and work up toward
the large end of the drumstick (where it anatomically joins with the thigh).
|
 |
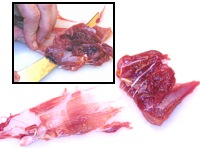 |
Work the blade in at that edge between the meat and the silver
skin (like filleting a fish).
Then, holding your blade at a 45-degree angle, shave as much of the meat as you can away from the silver skin
using a pushing and slicing motion.
|
 |
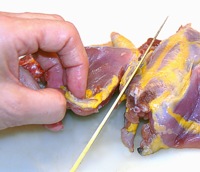 |
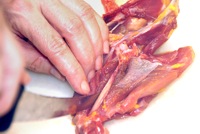
Removing the meat from the thigh is similar to the drumstick.
Looking down at the back of the bird, slice around the top of the thigh,
bringing your blade close to the spine to remove as much meat as possible.
|
 |
 |
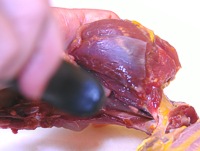
Working from the underside, slice lengthwise through the meat
where the muscles join to find the thigh bone (femur).
|
 |
 |
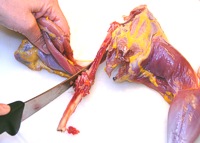
Run your blade along and around that bone to separate the meat. Here, the
cut continues up to the hip joint, where the muscle group is also cut free.
|
 |
 |
Finish separating the thigh meat from the leg here at the knee joint.
There won't be much need to do anything else to that section
except to look for bruise spots from shot, imbedded bird shot, shot-through feathers,
and/or bone shards - the usual bird hunting artifacts. Be sure you have
plenty of light as you look the meat over. Your guests will thank you, though their dentists may not.
 Repeat these steps for the other drumstick and thigh, rinse your six new cuts with
clean water, and pat the meat dry with a paper towel. This entire process is essentially the
same for any bird from a quail to an ostrich, but with the smallest birds (such as
quail, dove or snipe), you're often only going to bother with the breast meat.
|
 |
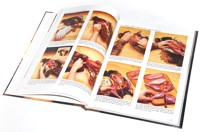 |
We hope this online tutorial is
helpful - but we also know that nothing beats having a good, well-illustrated book open
on the countertop next to you while you're tackling something new. There are many titles to
choose from, but for a great, well-priced book that covers the dressing and handling of meat
from the whole range of Big and Small Game, and both Upland and Waterfowl Birds, we particularly
like "Dressing
and Cooking Wild Game." No upland kitchen is complete without that sort of resource close
at hand (plus, it keeps the bird meat out of your computer keyboard!).
|
 |
-UL
|
|

|
|
|


